How to configure Google Consent Mode for WordPress or WooCommerce?
Google Consent Mode is a standard introduced by Google and become a requirement in certain regions to send data to Google Analytics 4 and Google Ads APIs. In order to learn more about the overall concept check out our blog post:
This guide explains how to use our simple Consent Mode Banner that comes in a FREE and PRO (paid) versions. This guide shows complete setup for PRO version but will be applicable for FREE as well.
Installation
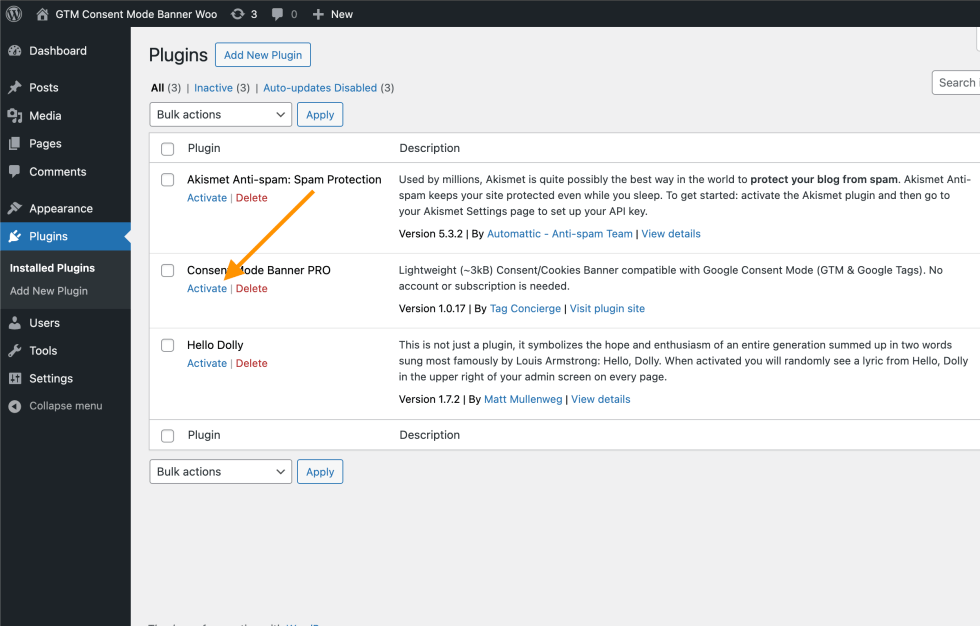
Install and Activate the plugin from main WP Admin Plugins section.
Setup
Customise main content
Navigate to Settings > Consent Mode Banner. Use the first screen to customise the main content of the banner.
During initial configuration it is handy to select Enable only for admins? option. It allows to preview Consent Mode Banner without deploying it to all users.
The banner consists of two views:
- Modal/Bar – the first view that has a description and three possible buttons:
- Accept – grants all consent types
- Settings – opens settings view
- Reject – denies all consent types except required
- Settings – view where user can select consent types individually and read detailed description. It contains separate description and following buttons:
- Accept – grants all consent types
- Save – save preferences as selected on the settings view
- Close – closes settings view without saving preferences
- Reject – denies all consent types except required
Each description field accept simple Markdown syntax:
- link – [Link Text](https://link-url.com)
- bold – **text**
- italic – *text*
Buttons can be hidden by removing their text.
Optional – Google Tag Manager snippets
Second section of the main settings view allows to optionally install Google Tag Manager JS snippets. It is useful when integrating GTM, but can be skipped if:
- you are not using Google Tag Manager using direct integrations for GA4 or Google Ads
- you are already installed GTM using other plugin or directly in the WP theme source code
Consent Types

Consent types are related to purpose of 3rd party tools using cookies and other tracking technologies. They explain reasons why certain user’s data is being processed. Each consent type is an entry in a table and it will be visible in the settings page of the consent mode banner. For each consent type you can specify:
- Consent Type – this is an internal name of the consent type exactly as it will be passed to dataLayer and to Google Consent Mode API. As per Google Consent Mode documentation these are standard values:
- ad_storage
- ad_user_data
- ad_personalization
- analytics_storage
- functionality_storage
- personalization_storage
- security_storage
- Title – user facing name of the consent type
- Description – explanation of what given consent type is related to. Supports basic Markdown syntax.
- Default – defines what should be the default state for the consent type. It can be one of following
- granted
- denied
- required – if set as required, this consent type cannot be set to denied by user interaction
- Additional Types (PRO) – a comma separate list of one or more consent types that will be tied to the main consent type. E.g. is consent type is
ad_storageand additional types are set toad_user_data,ad_personalizationwhen user selectsad_storageas granted it will mark all 3 consent types as granted.
Adjust Styling
The Consent Mode Banner styling is very lightweight and in most cases it should inherit and pick up global styles of the WP/Woo Theme, but if there is a need to adjust it’s look a separate text field allows to pass custom CSS rules.
For example you can style buttons look using following CSS selectors:
- .consent-banner-button – all buttons
- .consent-banner-button[href=”#accept”] – only accept button (be aware that in certain regions making “accept all” button more visible then other buttons may not be allowed)
- .consent-banner-button[href=”#accept”]:hover – hover state
Example:
.consent-banner-button {
  color: #454545; /* color of buttons text */
  background-color: #333333; /* color of buttons background */
  border-color: #222222; /* color of buttons outline */
}
Enable Banner
Finally, when all settings are done and you are comfortable with the content and look of the consent mode banner you can able it for all users ensuring both settings are unchecked:
- Disable?
- Enable only for admins?
Advanced
Consent Settings / Withdrawal
Once user provides their consent preferences the Consent Mode Banner won’t be visible anymore. In most cases you would need to allow users to modify their consent preferences afterwards.
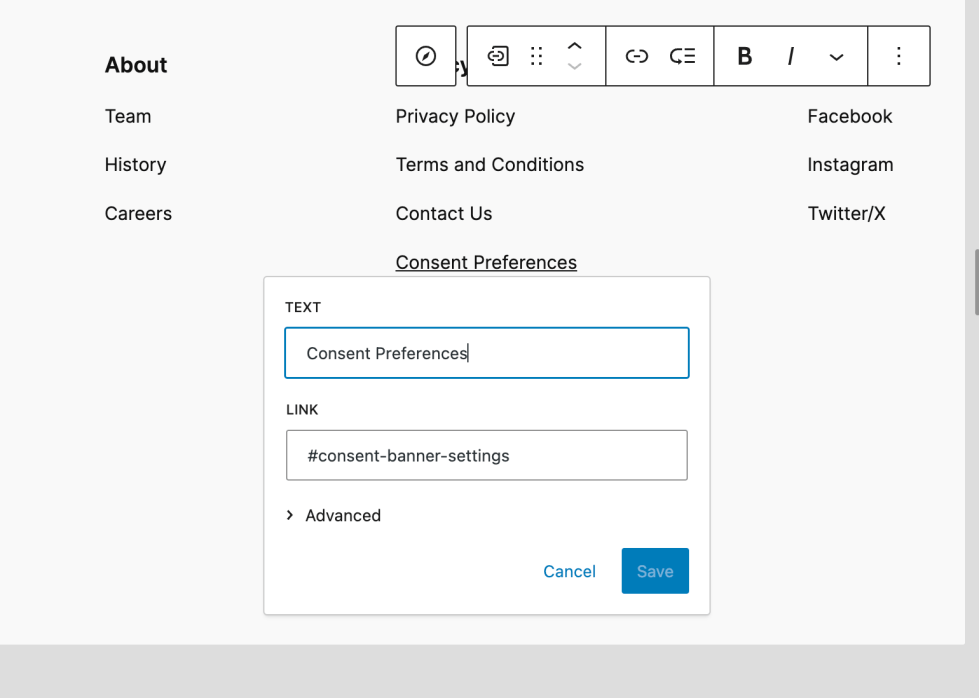
In order to do so, you can add a basic link anywhere on the page which will open the consent banner settings view again. Here is the link example:
<a href="#consent-banner-settings">Consent Preferences</a>
You can modify the link text, but ensure the “href” param equals or ends with “#consent-banner-settings”. Here is an example how to add it to a default WordPress footer:
Google Tag Manager
Google Consent Mode works out-of-the-box with Google Tags:
- Google Analytics 4
- Google Ads
It means the Content Mode Banner will work with those integrations when they are integrated directly via native plugins or using Google Tag Manager.
For other tags such as Facebook Pixel ensure correct Consent Checks are specified in Google Tag Manager Workspace. Lean more in following guide:
How to configure GTM Consent Mode?
When specifying additional consent checks on any GTM tag, ensure Consent Mode Banner is running and enabled before publishing changes in GTM. Otherwise, affected tags will never fire.
Cookies Deletion (PRO)
The PRO version of the Content Mode Banner has built-in cookies deletion feature that kicks in when user withdraw their initial consent. In this case the banner will try to match GA4, Google Ads, Facebook, Pinterest and TikTok cookies and delete them to reflect new choice of the user.